Setting up NeoVim for Ghidra Script Development
I started messing around with Ghidra for some research I am currently doing
which I will talk about in a future post. I needed to develop a script for
Ghidra but the editor in it is too basic (a simple text box). I am really used
to developing using vim (I switched to neovim a couple weeks ago) and
decided I’d prefer to use it instead of developing inside of Ghidra.
My requirements for this were:
- Code completion
- A linter in real time (to identify errors and warnings)
I had just setup CoC - Conquer of Completion
and figured I’d use its coc-java plugin to do this.
Without further ado, here is how I got it working.
Installing vim-plug
Easiest way I found so far to install plugins on neovim is using vim-plug.
Just download
plug.vim
and place it in $HOME/.local/share/nvim/site/autoload/plug.vim.
Edit your $HOME/.config/nvim/init.vim file and add to the start of it:
if has('nvim')
  call plug#begin('~/.config/nvim/site/autoload/plug.vim')

  " Plugins will be added here

  call plug#end()
endif
You should create the $HOME/.config/nvim/site/autoload/plug.vim directory if
it doesn’t already exist.
Open neovim and try the :PlugStatus command. It should open a window with
the status of the plugins that are installed.
Installing CoC
Installing CoC now is pretty simple. Just a matter of adding it to the list
of desired plugins in your init.vim file.
if has('nvim')
  call plug#begin('~/.config/nvim/site/autoload/plug.vim')

    " CoC for code completion with language servers
    Plug 'neoclide/coc.nvim', {'branch': 'release'}

  call plug#end()
endif
Just reload the init.vim file now (either by re-opening neovim or by
running :source /path/to/your/init.vim). After that just use the command
:PlugInstall to get CoC installed.
In order for CoC to work, you will need to jave both nodejs and yarn
installed on your machine. On Ubuntu just use the following apt command to
install those:
sudo apt install nodejs yarnpkg
Installing coc-java
CoC has many plugins for different languages. I am developing my Ghidra
scripts using Java so for that I need to install the
coc-java plugin.
After you have CoC installed, just run the following command on neovim to
install coc-java:
:CocInstall coc-java
That is it! This should be enough to get coc-java installed.
Installing gradle
The coc-java plugin uses either a maven or a gradle configuration file
in order to know how to build the java file being edited. The classpath
configuration is what is necessary to find the dependencies for the source
being edited so that it can be built and so that code completion and the
linter work. I found it easier to use gradle for this as there was already a
gradle file in the Ghidra directory that I was able to use as a base.
For gradle I just downloaded the binary from
here. I downloaded the binary-only version
of it. At the time of this writing, the latest version was v6.3.
After downloading it, just unzip the file and place it somewhere you like on
your machine. In my case I put it on $HOME/software/gradle-6.3. All you have
to do then is add the $HOME/software/gradle-6.3/bin directory to your
$PATH variable.
export PATH=$PATH:$HOME/software/gradle-6.3/bin
Preparing the development directory
I have Ghidra installed in the folder $HOME/software/ghidra_9.1.2.
By default Ghidra will look for its scripts in various directories. The
first one it looks at is $HOME/ghidra_scripts. This is where I am doing all
my script development.
In that directory, create a build.gradle file with the following contents:
apply plugin: 'java'

def ghidraDir = "/path/to/your/ghidra_9.1.2/Ghidra"
def ghidraProps = new Properties()

configurations {
    helpPath
}

sourceSets {
    main.java.srcDirs = ['./']
    main.resources.srcDirs = ['./']
}

file(ghidraDir + "/application.properties").withReader { reader ->
    ghidraProps.load(reader)
    project.ext.ghidra_version = ghidraProps.getProperty('application.version')
    project.ext.RELEASE_NAME = ghidraProps.getProperty('application.release.name')
    project.ext.DISTRO_PREFIX = "ghidra_${ghidra_version}"
}

dependencies {
    compile fileTree(dir: 'lib', include: "*.jar")
    compile fileTree(dir: ghidraDir + '/Framework', include: "**/*.jar")
    compile fileTree(dir: ghidraDir + '/Features', include: "**/*.jar")
    helpPath fileTree(dir: ghidraDir + '/Features/Base', include: "**/Base.jar")
}
Don’t forget to change the ghidraDir definition in the build.gradle file
with the appropriate path where you have Ghidra installed.
In the same directory, create a .classpath file with the following contents:
<?xml version="1.0" encoding="UTF-8"?>
<classpath>
    <classpathentry kind="src" output="bin/main" path="">
        <attributes>
            <attribute name="gradle_scope" value="main"/>
            <attribute name="gradle_used_by_scope" value="main,test"/>
        </attributes>
    </classpathentry>
    <classpathentry kind="con" path="org.eclipse.jdt.launching.JRE_CONTAINER/org.eclipse.jdt.internal.debug.ui.launcher.StandardVMType/JavaSE-11/"/>
    <classpathentry kind="con" path="org.eclipse.buildship.core.gradleclasspathcontainer"/>
    <classpathentry kind="output" path="bin/default"/>
</classpath>
And now, in this same directory create a Test.java file with the following
contents:
//@category Gilgalab

import ghidra.app.script.GhidraScript;
import ghidra.util.Msg;

public class Test extends GhidraScript {

    @Override
    public void run() throws Exception {
        try {
            int int1 = askInt("integer 1", "enter integer 1");
            int int2 = askInt("integer 2", "enter integer 2");
            println("int1 + int2 = " + (int1 + int2));

        }
        catch (IllegalArgumentException iae) {
            Msg.warn(this, "Error during headless processing: " + iae.toString());
        }

    }
}
This is how it looks like as you type your code:
Now open Ghidra and open the Script Manager (menu Window -> Script
Manager). In the new window displayed, click the Reload button and notice
that a folder called Gilgalab appeared in it.
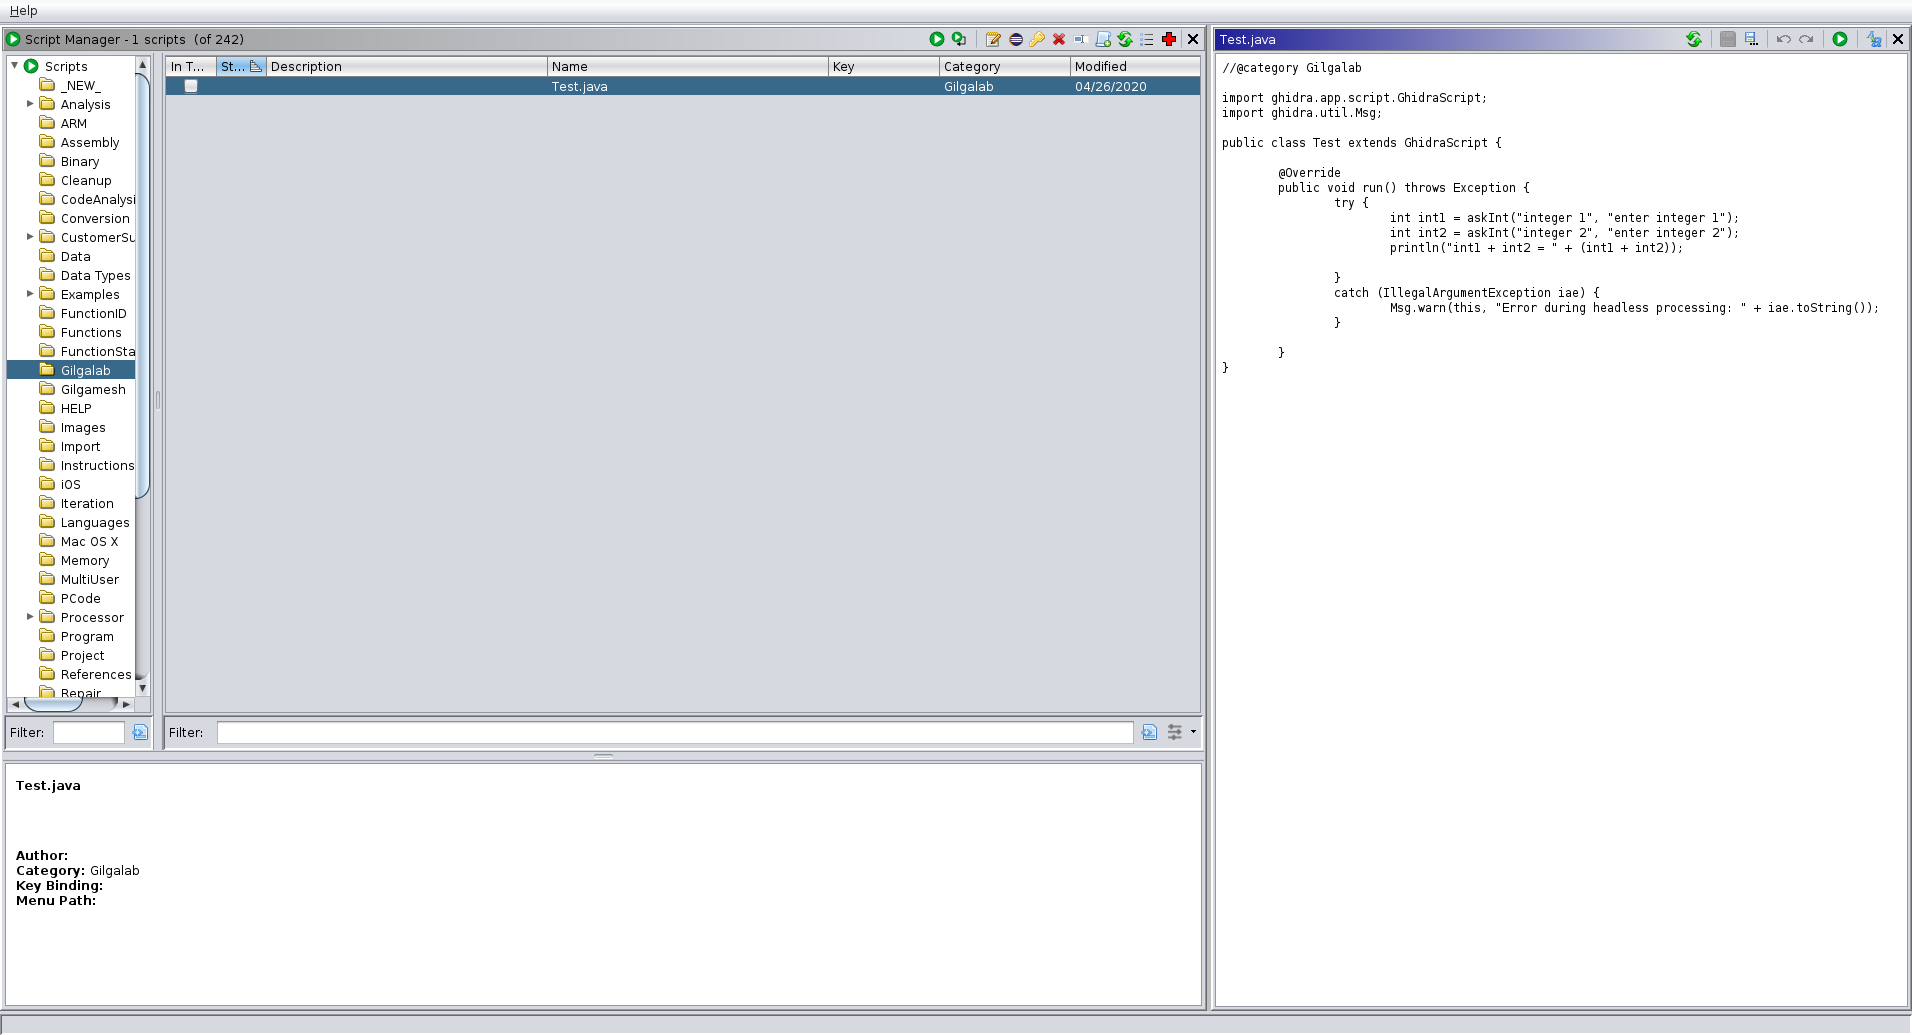 Ghidra Script Manager
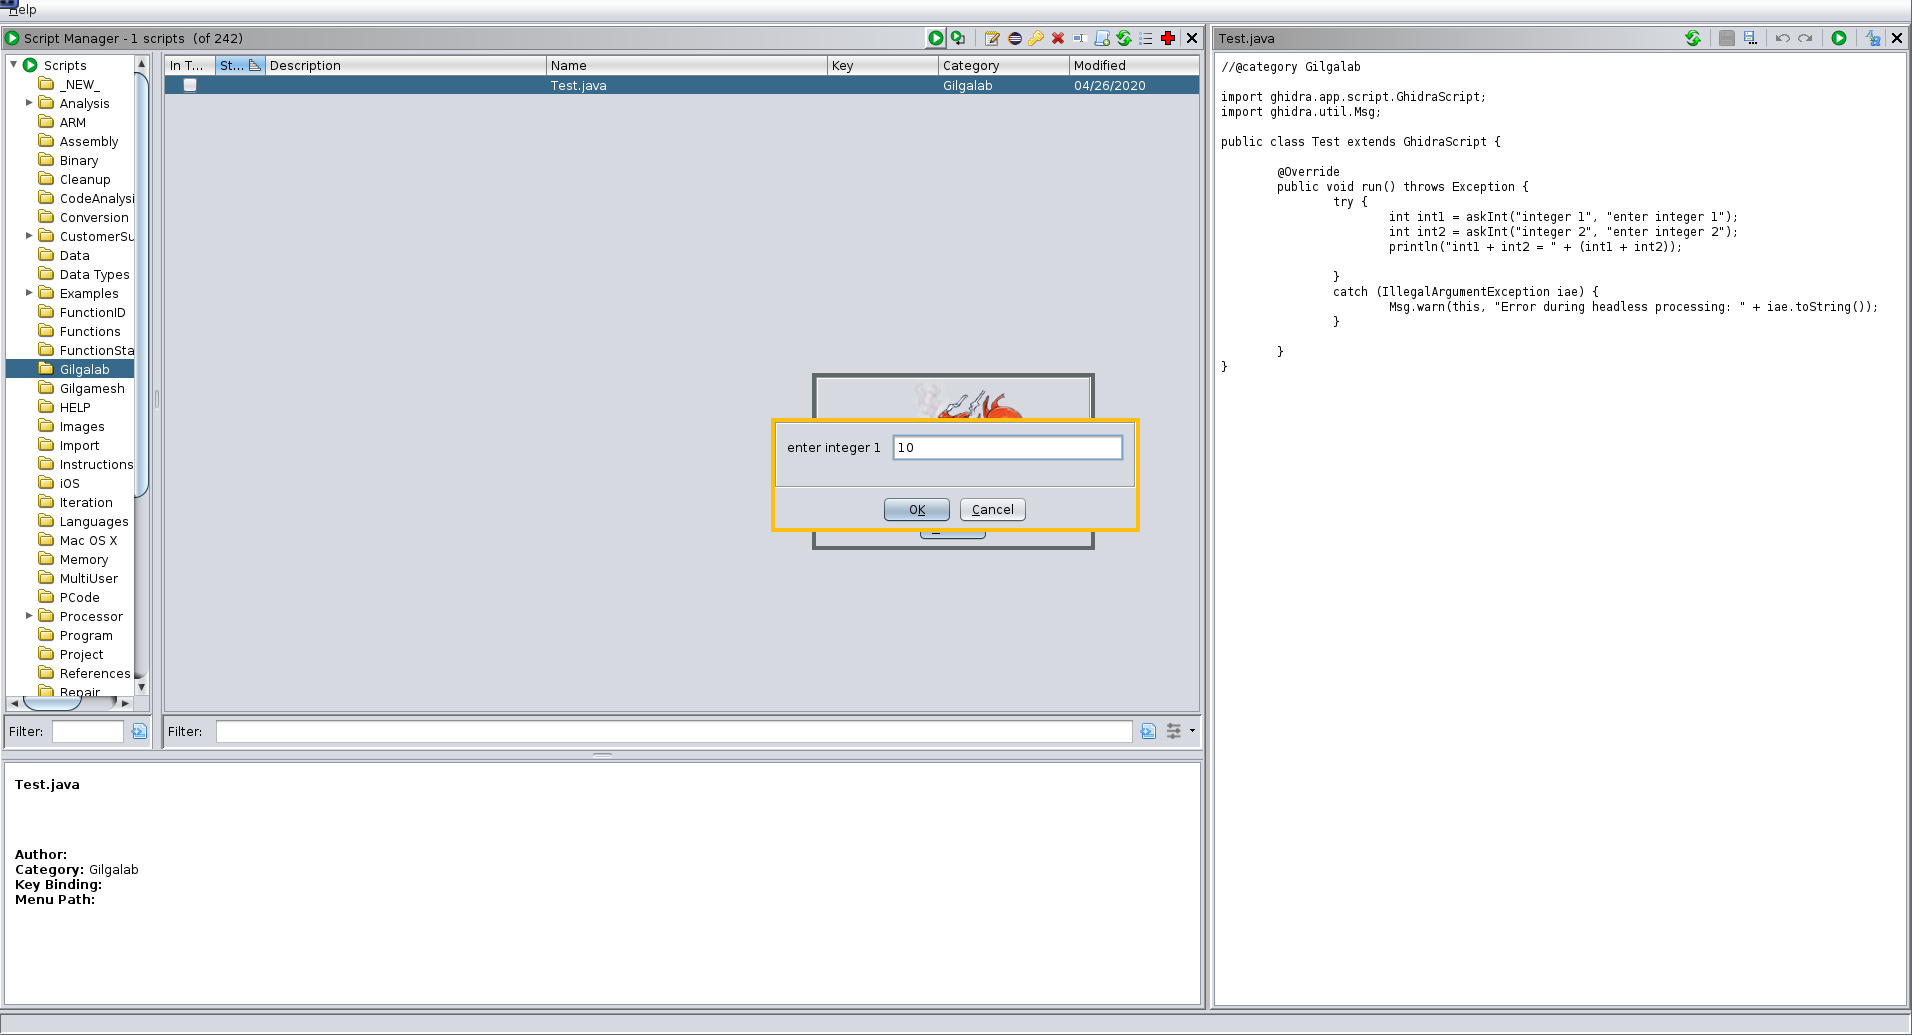
Inside that folder you can see the Test.java script. Click the Run button
and it should ask you for two numbers and should show you the result of the
sum of those numbers in the Console windows (menu Window -> Console).
 Running the test script
After entering the value 10 for the first input and 20 for the second, the
result can be seen in the Console window (menu Window -> Console).
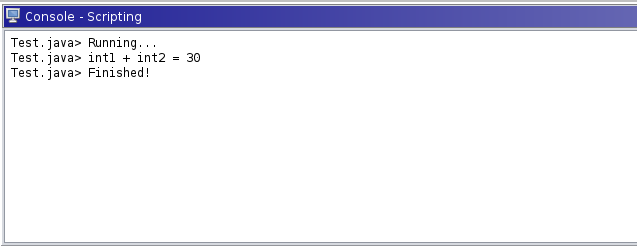 Console windows showing the result of the script execution